In this write-up, I’m going to talk about the things we learned from our bad rooftop solar installation job as we’re in a rather unique position to show you what a good job and bad job looks like.
You see, putting solar panels on our home had been something we’ve been wanting to do for decades, but it didn’t finally happen until the year 2021.
Then, after a year of use, we learned that we didn’t have enough solar panels to offset our usage so we did a second solar installation to add more panels.
However, it wasn’t until a few months had passed when some rain storms made us realize that one of the solar installation jobs was not done right.
So let’s get into our anecdote of how this homeowner headache unfolded as there are many lessons learned along the way, which you may find useful to incorporate into your decision making.
After all, we all know solar jobs aren’t cheap, and finding out about botches after that kind of money had been spent is a real punch in the gut!
Chapter 1: The Initial Solar Installation Job
Procuring The Solar System & Repairs To Be Made

Our initial solar install involved re-roofing before putting on the solar, and that was a major consideration in terms of which contractor we should go with.
During the course of fielding quotes, we chose between at least 5 different contractors, but it ultimately came down to choosing between Treeium (a solar specialist) and CRS or Certified Roofing Specialists (who specialized in roofing).
The quotes were competitive to each other, but the decision to go with CRS ultimately came down favoring their strong roofing background over the competitor’s strong solar background (knowing how important a properly installed roof was).
Anyways, as we went forward with the roofing job, that uncovered a lot of underlying issues with the house concerning termites and damage that had to be repaired, which led to a whole slew of additional repairs that needed to be made.
Indeed, most issues that had gone mostly unnoticed or undetected were going on behind the walls, which doing the re-roof exposed to us.
We eventually made the repairs and tented the house after both these repairs were done and after the solar was installed (the beneath-the-roof “surgical” repairs performed by Sky Net Termite – a structural repair specialist).
Actively Participating In The Solar Installation Process

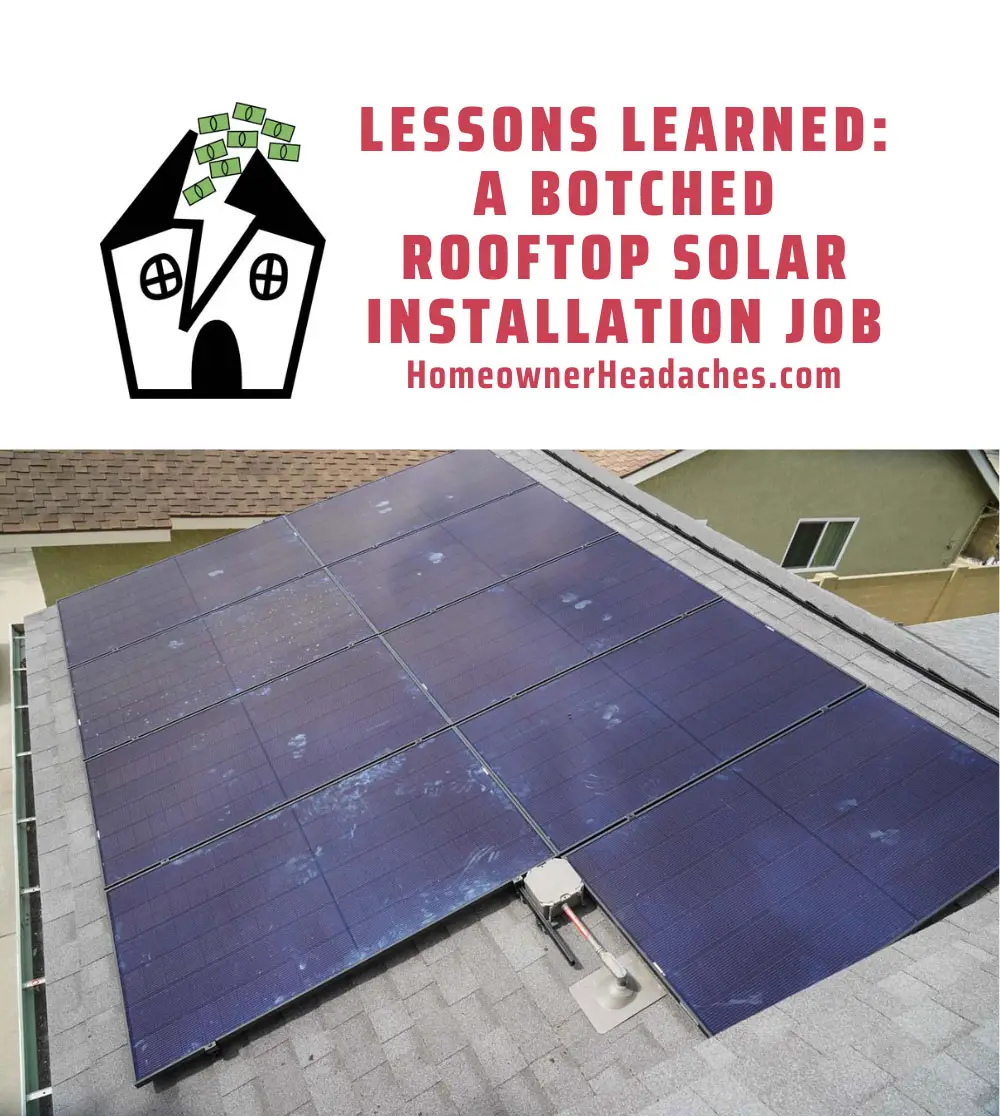
Now that the roof was complete, the same roof contractor installed our first array of 15 375AA REC alpha solar panels on the west-facing roof, which had the most space available.
Knowing that CRS wasn’t as strong with their solar offerings, I was an active participant and ultimately got them to procure the REC solar panels instead of their standard LG ones that they were going to put on for us.
I chose the REC over the LG after looking at their data sheets (something I can read since I have an engineering background).
The rest of the system involved putting on Enphase IQ7+ microinverters for each panel, which also went to an Enphase IQ 3-ES Combiner Box, and they also upgraded our electrical panel to accommodate the solar (as our old one didn’t cut it).
We had thought about using the solar team at CRS to make further changes to the electrical wiring (with potential tax credit benefits for doing so), but it turned out that they tended to overcharge for such services.
In fact, I suspected that the upgraded panel probably came at a premium, too, so perhaps getting fleeced in the name of adding to the solar tax credit wasn’t the right move to make in this case.

Thus, we eventually went with a local, more dedicated electrician to do those tasks.
Further complicating the solar install was that there were delays as well as lots of follow-up on our part to ensure that the proper permits and coordination with the city as well as the utilities were done right.
That was a whole ordeal in and of itself (not nearly as smooth and as efficient as the roof job, which happened within a week), but eventually after nearly 2 months delay after the solar panels were up, we had finally turned on our solar!
Unfortunately, after about a year of our new rooftop solar array and watching the meter finally slowing down (or even going backwards), we were surprised to see that we were still charged around $90-$100 per month on our electricity bills!
It was at that point that we realized that our solar system was insufficiently sized (likely a consequence of how inexact extrapolating energy use from our electricity bills were).
And we had to decide whether to live with the undersized system or do something about adding more solar panels to our existing array…
Chapter 2: Adding More Panels to Our Solar Installation
Could We Add Solar Panels To Our Existing System?
 handle the additional solar panels without losing out on production efficiency?")
Before committing to adding more solar panels to our system, I did some research to see if it was even possible.
When we talked to Enphase about this, they said it was possible, but they weren’t specific about whether we needed to add another combiner box or not (i.e. more cost).
In fact, there was a surprising lack of clarity on getting this answer about whether we could add more panels to our system, and how many panels could it support before complications would arise.
You see, the problem was that I was worried about clipping, which is when the AC current that converts the DC current generated by the solar cells flattens out instead of maintaining its sinusoid shape thereby losing out on efficiency.
We know that clipping could occur within the microinverters themselves (where say the production from the solar panels far exceeds the current and voltage limits of its corresponding microinverter).
However, I wasn’t sure if the combiner box adding up all the contributions from the microinverters in the array could also clip.
Based on my understanding of the limitations of our Enphase IQ Combiner 3-ES box, we could add 10-11 more panels on a separate “string” to that box without needing to get another combiner box.
Of course, it would have been better to have IQ8A microinverters inverting the next solar cells we’d be procuring, but they’re apparently not compatible with the IQ7+ microinverters that were already behind our REC375AA panels on the roof.
So that limited what solar cell-inverter combo we could pick for our expansion as well as how many panels we’d want to get to fit onto our limited garage’s roofing space facing south.
These were the kinds of concerns we also brought up with the prospective contractors we were fielding for this next job as it seemed clear that we weren’t going to get straight answers easily.
Procuring The Secondary Array

When we learned that the 26% federal tax credit for solar installations was extended and that it could include additional solar installations (and not just the original one), that sealed the deal for us to move forward with committing money.
So we fielded offers on who should do the solar addition job, and it ultimately came down to the incumbent roofing company CRS and a solar specialist called Forme solar.
The decision to go with Forme solar for this second job was decided by our not-so-great experience with the CRS office concerning permits, pricing, and their hesitation to max out on putting panels on our south-facing garage.
Meanwhile, Forme was very responsive to Julie’s inquiries, and they were able to work with the local city planning office to allow solar installation to the south-facing garage because the garage was not a living space.
That meant that the fire department could easily access the garage from below, and thus the backoff clearances from the edges (the very thing CRS didn’t want to challenge) didn’t apply.
Well, CRS was willing to put as many as 6 panels over the south-facing garage, but Forme was able to put 9 though we had to contend with shade and a tree that would have really impacted production on any more panels placed there.
And that 9-panel install involved REC400AA cells (the original REC375AA were already discontinued) with Enphase IQ7A microinverters, as that was what we paid money to move forward with.
The Secondary Solar Installation Job

Anyways, it took some time to get the job completed because there was a fairly long 8-week period where no work commenced once the contract was signed (though we never understood why the delay was this long).
After some contentious follow-up with Forme regarding the delay and lack of communication regarding this waiting period, they finally showed up to do the job (about 7 weeks after signing the contract).
On the day that they did the job (which fortunately was a Thursday that I could take off early), I found out that they were about to deviate from our understood plan of the conduit route.
That conduit was supposed to go from the garage’s rooftop, through the garage, and a side wall beneath the eaves and behind the fascia, and out to the combiner box out back.
The contractors were out to get parts that would have gotten them to put a hole into the attic, go through the tighter confines of the attic, and then get through a vent to access the combiner box out back!

When I was made aware of this intention, I put the brakes on that straight away and had them adhere to the original plan of going through the garage with minimal work and impact to the rest of the house!
Good thing I showed up when I did because that could have really made a mess of things (let alone making a simple job way more complicated)!
Eventually, the job was done the way it should have been done in the first place, but it got dark by the time they finished so we couldn’t test out the installation.
It wasn’t until the next day that I found out that the second array was neither producing nor communicating with the Enphase Combiner 3-ES box.
So we had to contact Forme to get someone out here to investigate.
Eventually, the issue was fixed, but the city inspector made sure one corner of the array was secured (it wasn’t) before finally everything was approved and we could turn on our expanded solar array with the utility’s blessing.
The New Solar Combined Solar Array

For the remainder of the year (the install was completed in early March 2022), we immediately saw the jump in production (which was around 40% greater than what the initial array produced).
However, there was still some complications with displaying the information through the Enphase app, and that involved working with Forme’s support.
Eventually, a friendly guy named Terry (who was apparently the person in charge of the installs for the immediate region) came out to our place to ensure things were going smoothly.
After hearing it from Julie regarding our experiences so far, he apparently threw in a consumption meter for free so the Enphase app could tell us both our real-time production and consumption amounts as seen by the electrical panel.
The solution to the Enphase App complications had to do with some intervention required by the contractor to enable showing us the second array in addition to the first array (since that first array was done by a different contractor).
As a result of this development, we were finally gaining full clarity about how much electricity we were consuming as well as how much electricity we were producing.

From this data, we learned that on sunny days, we were producing far more than what we were consuming (so perhaps we were a little aggressive with our sizing of the 2nd array).
However, the utility’s billing was confusing in that they gave us like $1000 a year credit, and we’d have to spend down that credit (though it’s not clear what happens to the unspent credit at the end of the annual billing cycle).
The bottom line was that when it gets hot, we could turn on the central air in prolonged bursts before it would offset or put us in the red as far as production versus consumption was concerned.
However, on cloudy and rainy days, we saw the impact the lack of sun had on our combined production, which we couldn’t do anything about, and the shorter day months of November through January more consumption than production.
And when a series of atmospheric river storms came and drenched Southern California towards the end of 2022, that was when we realized that we had a different problem on our hands…
Chapter 3: Roof Leaks from the Solar Installation
Discovering A Leak And Fixing That Leak

During the first of the heavy atmospheric river rain storms that occurred around November 2022, Julie sent me a video of an active leak that occurred right beneath a flashing that Forme had put in during their install of a conduit into the garage.
It was a good thing that this leak happened in the garage because we could easily see the leak and the source of that leak.
If this leak happened over the attic, who knows how long it would take before the water would get through the insulation and then onto the ceiling before we’d finally start to see evidence of a leak!
Julie called Forme about the issue showing them both the video and the pictures from this bad leak, and within a week, there was a team of Forme people that showed up to our home to fix the problem.

It turned out that the way the flashing was placed on the initial install wasn’t beneath the shingles so water would get beneath the flashing and through the hole that they put!
This worried us because this was basic roofing practice that was not adhered to, and it made us wonder what else they might have botched with this job.
Anyways, after this quick job was over, we did some test by spraying a garden hose on the roof to see if the leak was still happening beneath the flashing.
It was hard to tell if any water got through because that wood was still moist from the original leak, but at least it wasn’t dripping like it did during the incident…
Discovering Another Leak

After about another week or two passed, there was another series of atmospheric river storms that hit Southern California.
By the time the storms had arrived, the wood was dry enough so we could tell if there was evidence of any new leak that would occur.
Well, when the rain came down hard again, Julie showed me pictures that the wood (shiplap) was once again moistened with an obvious wet spot.
So once again, when the rain calmed down, Julie called Forme about the issue showing them the latest pictures.
Unfortunately for us, Forme wasn’t as urgent about fixing this leak because the utility companies SCE and PG&E managed to get their way with the regulators in terms of changing net metering to pay 75% less for rooftop solar energy production.

That meant that solar contractors were scrambling to get new installs for new customers in an effort to capitalize on getting them grandfathered in before Net Metering 3 or NME 3.0 (versus NME 2.0) would kick in.
This left a real bad taste in our mouths, but eventually Julie threatened them with reporting them to the contractor board and the Better Business Bureau before Forme finally got someone to come out to fix this issue (two weeks later).
Meanwhile, I took some time to crawl into the attic to see if we were seeing any of these issues with the flashings that CRS had done throughout the rest of the house.
It was also an opportunity to see if any pests (like rats) made their way into the attic, which thankfully did not happen.

Anyways, when I saw that there was no evidence of a leak as seen from the attic, I then went onto the roof to see the difference between CRS’ job and Forme’s job.
When I took a closer look at Forme’s job, I could see that their flashing installation lacked any caulking or liquid cement seal whereas CRS were really generous with the sealing.
I had also discovered some shingle damage from the Forme job (exposing some of the underlying waterproof layer), but I had a feeling that wasn’t the root cause of the latest leak issue.
That said, it did make us wonder if the 50-year warranty of our Owens-Corning roof system that CRS had installed was compromised.
Finally Fixing The Leak

The Forme contractor that came to address the leak came out on a Friday, which I had the day off so I could be there to supervise the job and ask questions.
It turned out that the flashing was still not put in correctly because the rubber gasket that the conduit went through was concave instead of convex.
That meant that the water could pool in the concave part and then leak between that gasket and the conduit itself.
The contractor ultimately fixed the gasket shape, and he was about to call it a day, but then I asked him about why the non-leaking flashings that CRS did all had liquid cement seals and this one didn’t.
He initially hesitated and said that he could put those in “if I wanted”, but it wouldn’t “look good”.

To that, I told him to just put a lot of it on as no one is going to care if they see the liquid cement on the flashing or not.
Once that was done, then I let the contractor go, but we still had concerns about the shingle damage, which might involve a lot more work (including lifting the solar panels) to rectify.
We had to weigh the risk of additional work being done against the consequence of the damaged surface shingles, and that was not an easy decision to make.
In any case, with the subsequent atmospheric river storms that showed up in the following weeks in December and early January, we saw that there were no more wet shiplap beneath the flashing in the garage.
And so it appeared that the problem was finally solved!
Damaged Roof

Thinking that the dramas behind our Forme solar install was finally behind us (except for deciding what to do about the damaged shingles), Julie then discovered and showed me damage to the shiplap at a different part of the garage roof.
I knew right away that it was around where the Forme contractor had placed a ladder to go onto the roof, and it was around the part where we had to walk between the panels to the flashing over the garage.
That discovery made us realize that with each time we went on the roof of the house, there was a chance that the underlying shiplap could crack and get damaged under our weight.
That realization forced us to reconsider having Forme come back out to fix the damaged shingles because who knows what else might get damaged with the next intervention?
As a result, we ultimately decided to not pursue the shingle replacement or repair (especially since CRS would only redo the entire thing correctly at a cost of at least $1000), and thus it was something we had to live with.
We took solace in the fact that it was the garage we were talking about so we could see issues as they would arise as a result of this complication.
But as for the shiplap damage, knowing what SkyNet Termite can do in terms of shoring up damaged or weakened wood structures to the house, this seemed like a quick job knowing that a block can be reinforced between the rafters.
As of this writing, we still haven’t made the call out since money is tight given the inflation these days, but we know that it’s something that should be done eventually…
Conclusion

So after having done two different solar installs with two different companies (one who’s a roofing specialist and another who’s a solar specialist), we’ve been in a unique position to compare the two experiences.
And from our personal experiences with what turned out to be another homeowner headache, we learned that our roofing contractor CRS was very strong in roofing practices but not as strong with the solar and electric side of things.
On the flip side, we learned that our solar contractor Forme was strong with the knowledge of solar products and our options but not strong with the best roofing practices.
Ideally, we wanted the best of both worlds, but our experience had proven that it was very difficult to find such contractors that excelled in both aspects of solar installation and roofing.
As a result, our fears about the consequences of each contractor’s shortcomings had been realized, and it was the basis for the anecdote behind this write-up.
If we were able to turn back time, the one thing we’d do differently if we found ourselves going with the dedicated solar contractor would to be physically present to supervise the job as it’s happening.

But this assumes that we knew the proper roofing techniques in the first place (something we only knew about after learning from the folks at CRS, especially after realizing that they do good work as far as roofing is concerned).
Indeed, armed with that knowledge, we would be in position to catch out the mistakes made by the dedicated solar contractor immediately if they weren’t doing the job right.
Hindsight’s always 20/20 isn’t it?
Speaking of hindsight, this experience was an eye-opening lessons learned about what can go wrong if a solar job (let alone any job) is not done right.
I hope that our anecdote is a cautionary tale of what you need to be aware of when you’re considering putting solar panels on your roof.
Because what you don’t know will hurt you, and as you can see from this experience, we have the monetary scars to prove it!
If you have questions or comments about this write-up, please leave them in the comment box below…
Another great article Johnny, I am glad you decided to put all this information out there! I have been eager to go solar myself for quite some time but am afraid what I may run into after reading this article. You see, my house is older and there’s no telling what kind of state my roof is actually in as I can see that there are three layers of singles on the roof. It’s good that got have the background to read those data sheets and therefore didn’t have to suffer with the inferior LG panels that were supposed to be installed.
I’m going to have to give this much more thought now that I’ve read your experiences but I really appreciate you sharing them.
One thing I wouldn’t put off is getting the roof done (especially if you know it’s old). That’s because you never know what goes on where you can’t see. The roof will certainly uncover a lot of those issues in addition to leaks.
As for going solar, where I live, the utilities already got their way with jacking up energy rates in addition to cutting back on net metering credits (now about to be 25% of what it once was). You really have to weigh the cost of inaction versus the uncertainty of inevitable rate hikes over time.
So now you have to either rush to get a solar job done and the grandfathered net metering policy before the new policy kicks in mid-March. Or, you have to fork out even more money on batteries (further making green energy more of an option for those with money but not the ubiquitous solution it needs to be with all the other market distortions we’re dealing with now).
Johnny,
I am so thankful that I ran into your website. We are anticipating purchasing a new home sometime this year. This will be my husband’s second purchase and my first. After reading your post, I have learned so much about what goes into owning a home.
I can only imagine what you had to go through with your solar panel installations. This is not the kind of outcome most homeowners expect, so I really value this information. Your website will be a great resource for my future reference.
Rachele
Hi Rachele. Glad you found the info shared on this website helpful. Hopefully, you don’t have to go through our lived experiences of botches and unpleasant surprises!