We’ve experienced the misfortune of having a botched or bad bathroom remodel job, and we ended up paying a lot more in terms of money and potentially our health.
With hindsight being 20/20, it’s easy to say we could have done this or should have done that, but the reality of the situation was that it took us about seven years to figure it out.
That was long after the excitement of having finished the bathroom remodel, but we learned the hard way that you should really pay attention to what happens behind the wall instead of how it looks when it’s done.
Indeed, what we didn’t know certainly hurt us… a lot!
Especially when it comes to the house, which is likely the biggest expense or investment in one’s life, you don’t want to make the kind of mistakes that turn your home into a money pit or a death trap.
So to help you avoid the costly mistakes that we’ve made, we’re going to share with you…
- how we figured out that our bathroom remodel job was wrong to begin with
- why the job was botched
- how we ended up doing the remodeling correctly
- how much our remodel jobs have costed us
Hopefully, you’ll find this article helpful, even if it forces us to relive this painful chapter in our lifelong journey that is homeownership.
How Did We Know We Had A Bad Bathroom Remodel?
It took us seven years to figure out that something was wrong with our bathroom remodel job (not just aesthetically but functionally as well), because we didn’t know what to look for back then.
Luckily for us, we also had a lot of tile work done by a specialized tile contractor on our rental home just a few months after our home remodel was finished by a general contractor.
That was when we saw how the tile contractor was meticulous in his prep work throughout the entirety of the project, which involved installing wood-looking tiles throughout the house as well as tiling of both bathrooms.
Only then did we look back at our home’s bathroom job and start to notice issues that we had otherwise overlooked or never knew to pay attention to.
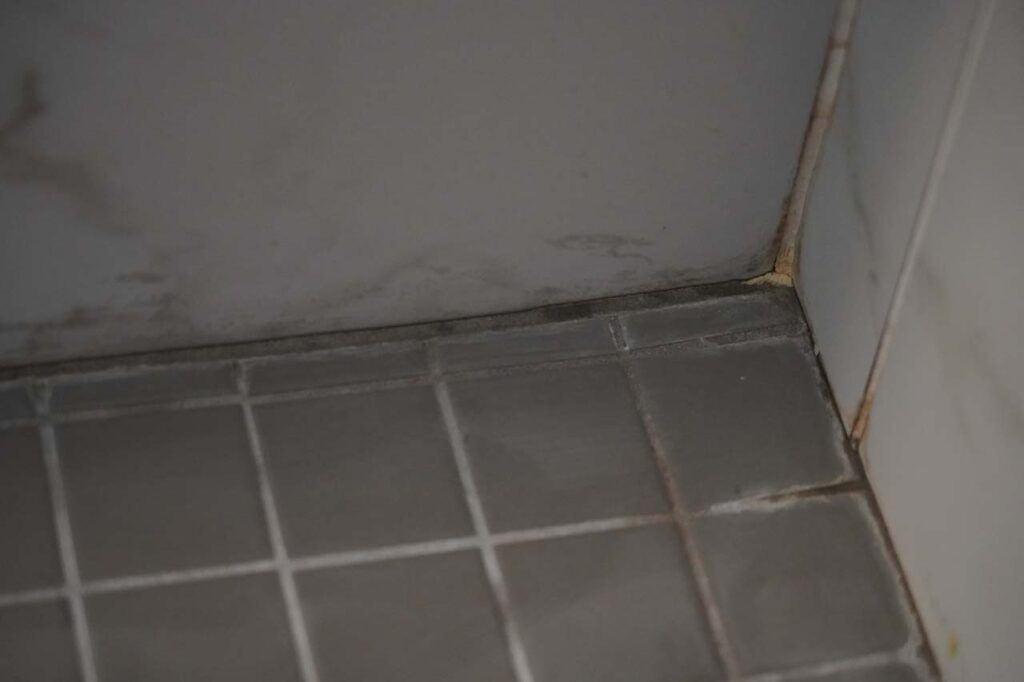
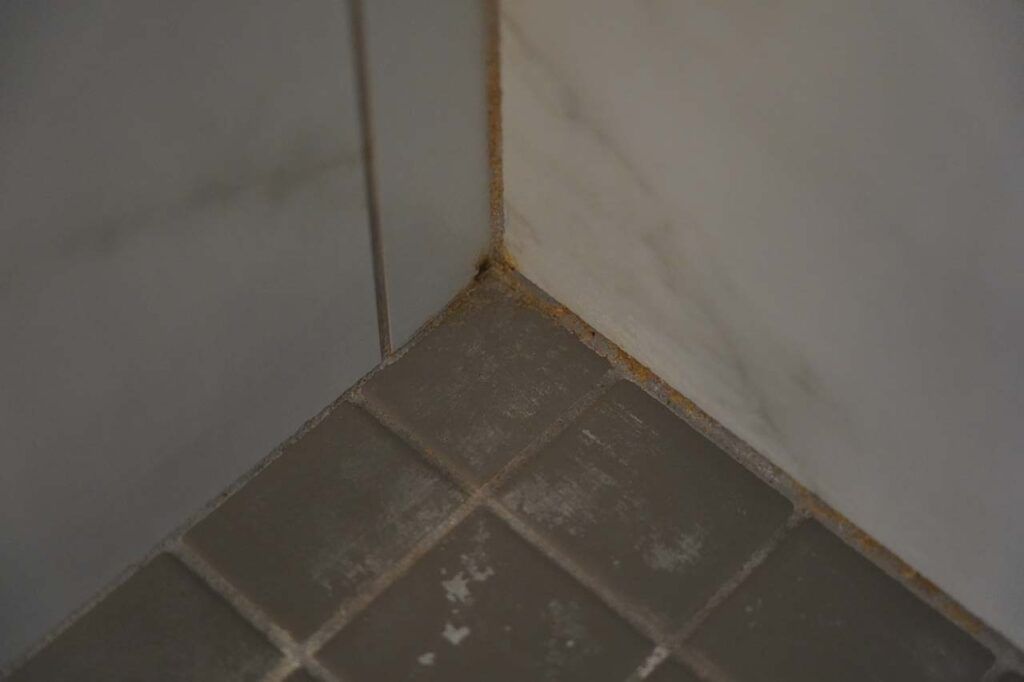
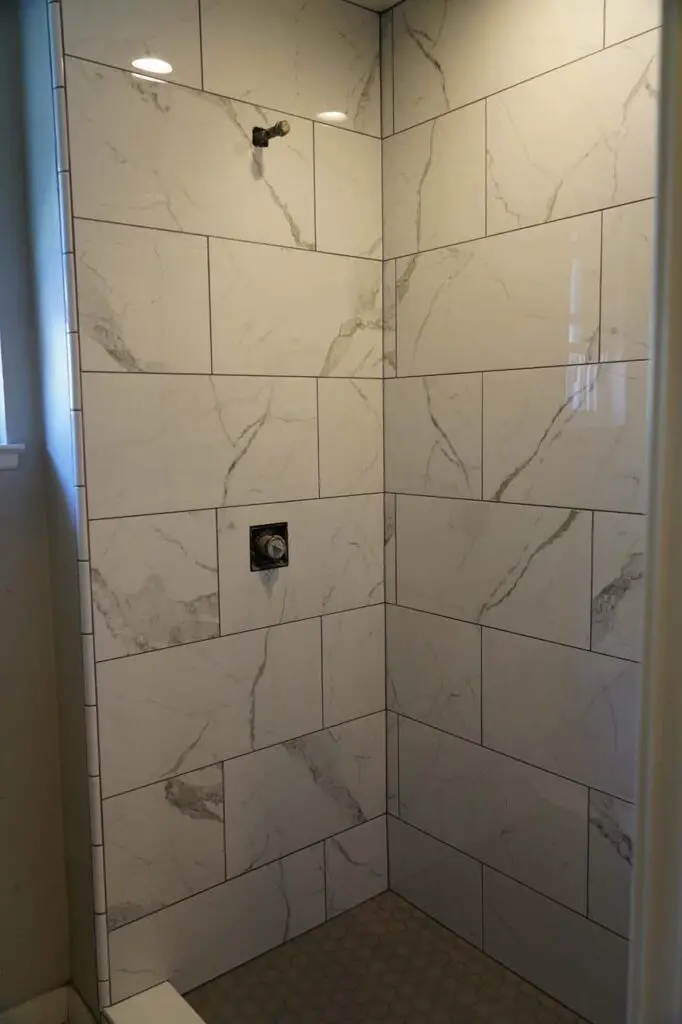
Such issues that came to our attention included uneven tile placement, water not quickly draining in the floor of the shower pan, and the easy build-up of deposits as well as mold in the grout.
However, the kicker was that seven years later when a bad tenant finally vacated the rental house, we saw that the bathroom tiling there was still very much intact despite the tenant’s abuse seen elsewhere.
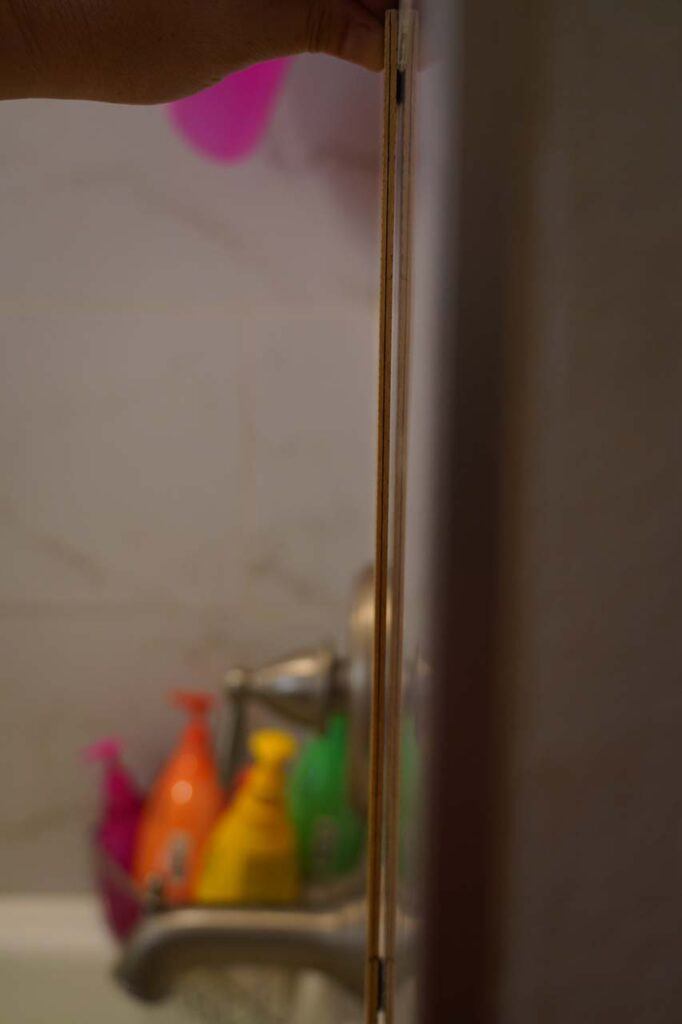
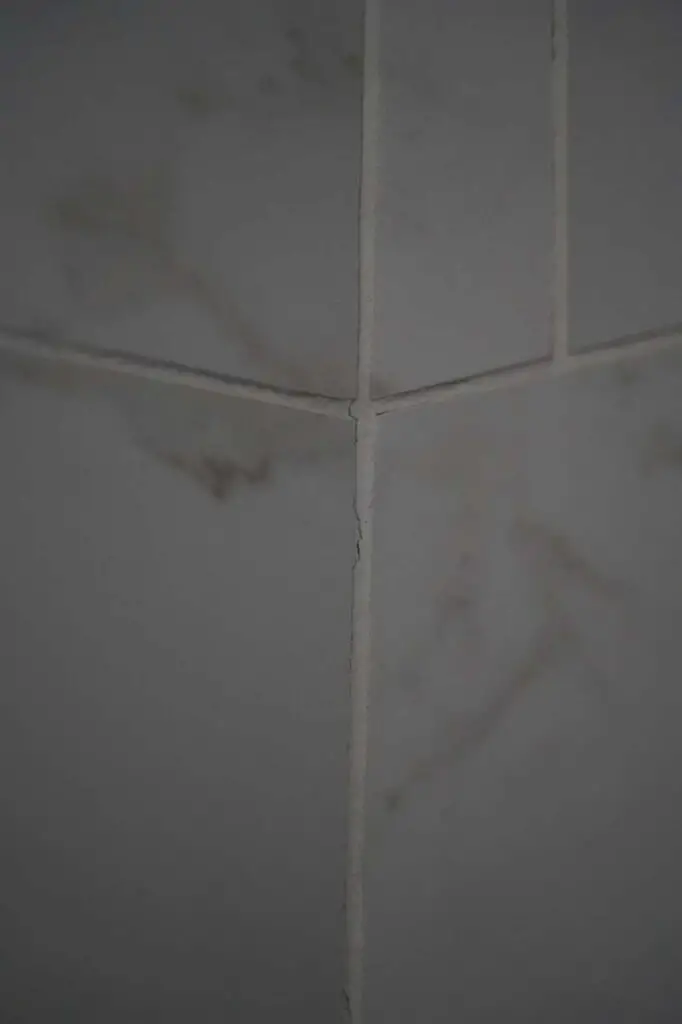
Meanwhile back in our own home, we started to notice cracks in the grout emerging and growing, especially in the master bathroom.
I knew these cracks were bad news in terms of potential mold build-up behind the wall, but who knows what else was bad about our shower and bath installs?
In any case, the writing was on the wall as far as we were concerned, because in the same seven-year timespan, the rental’s bathrooms still held up while our home’s bathrooms clearly showed signs that it needed to be redone.
That was when we finally made the painful decision to eat the cost and redo both of our bathrooms in our home.
So in summary, the following were the symptoms that made us realize our bathroom remodel was botched…
- Cracks in the grout (especially along the shower’s corners and on the floor)
- Uneven tile placement (i.e. “not square”)
- Mold build-up where tile placement was uneven as well as in the corners
- Persistent wet grout that stays wet for hours (even days) despite having ventilation
What’s Going On Behind The Tiles Of Our Bathroom Remodel Job?
Even though we recognized the symptoms of a bad bathroom remodel job in our home (when it was already too late), we still had to understand why the job was bad in the first place.
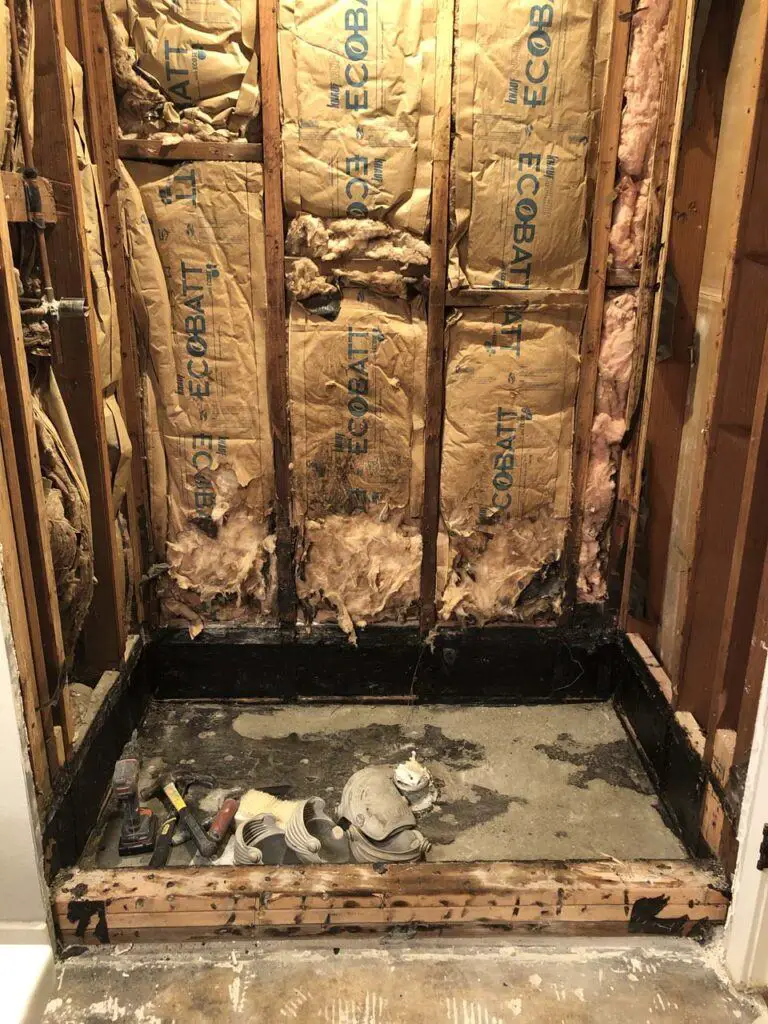
Unfortunately, the root causes of the issues we were seeing couldn’t be determined until we demolished (or “demoed”) the bathroom.
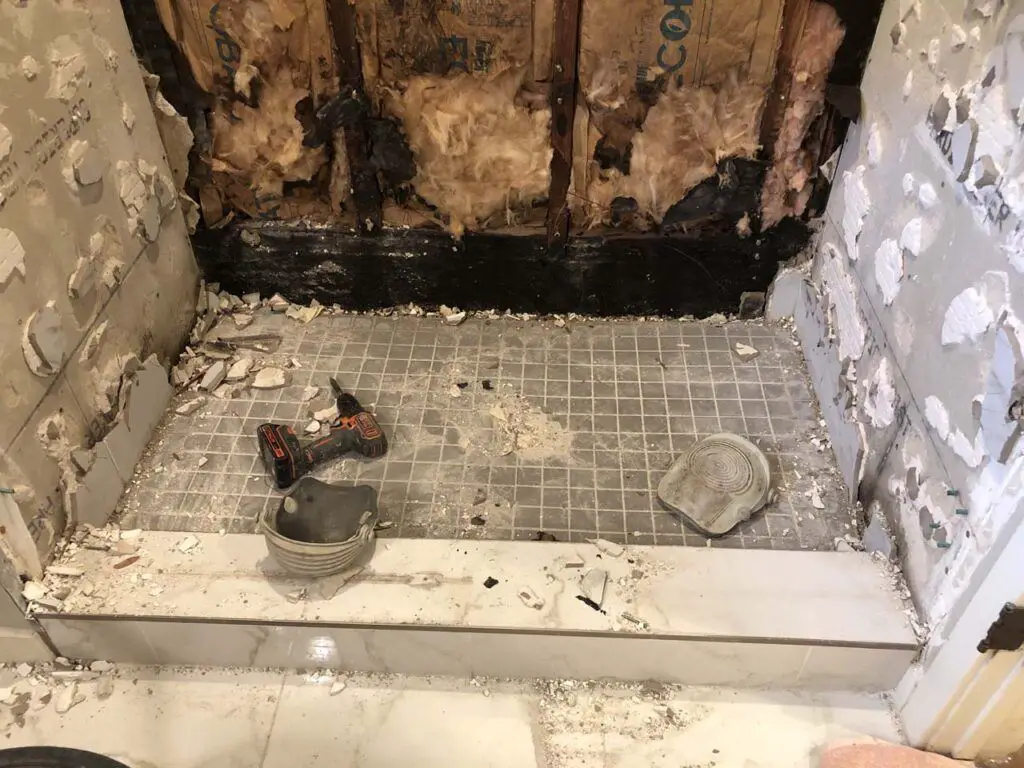
Upon doing that, we saw that the water intrusion did indeed lead to mold that was growing on the backer board, which was unseen behind the tiles.
Luckily for us, we acted soon enough to remove those backer boards before the toxic mold would spread onto the house’s support structures like the wood studs and beams.
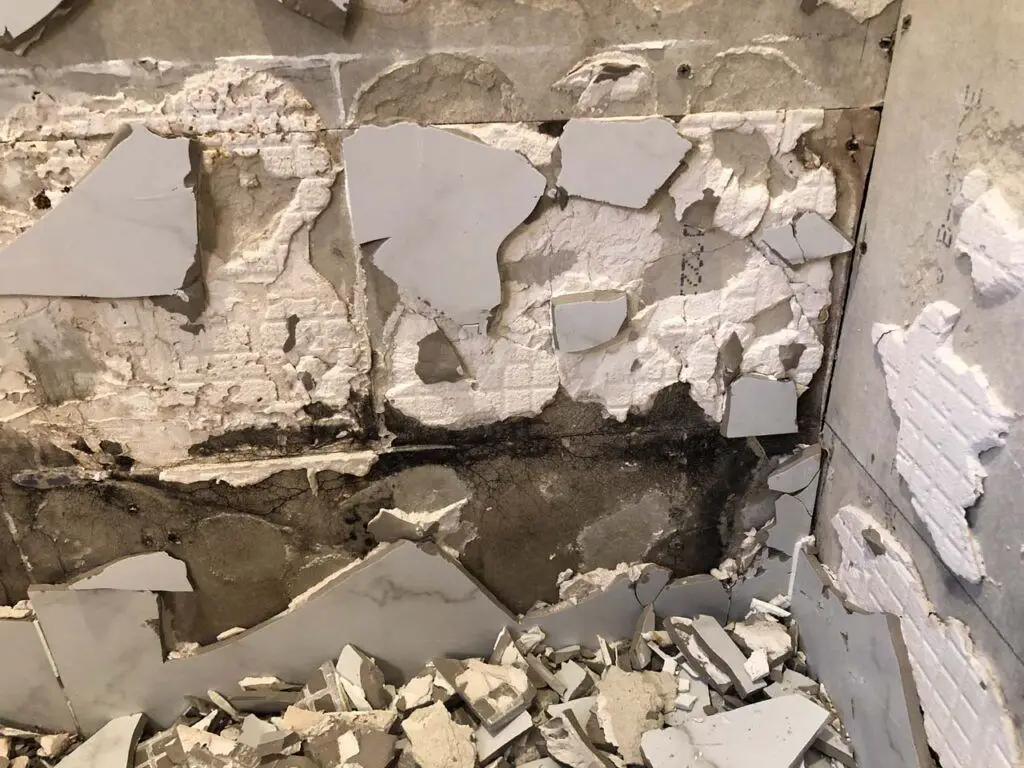
For if that happened, then we’d have to spend more money and time to remediate the mold since the house’s structural skeleton couldn’t be removed without it becoming an even bigger deal.
As for what the general contractor did improperly, we saw that he didn’t apply a vapor-resistant barrier where the backer boards were joined, especially at the corners.
After all, the tile, grout, mortar, and backer boards themselves were not waterproof, and the failure to do this step pretty much meant that water was freely able to penetrate into the parts of the house that weren’t meant to get wet thereby fostering mold growth.
The following video below shows how you’re supposed to apply vapor seal if you’re using a backer board implementation.
Another misstep that the general contractor did was not applying enough mortar against the backer board (he splotched it) instead of thoroughly applying it as he placed the tiles.
This allowed the tiles to move (as well as not being flush with the backer board), and thus, it caused cracking in the grout, which in turn made it even easier for water to get through the tiles and onto the (unprotected) backer boards.
Yet another thing the general contractor did that the tile contractor wouldn’t recommend doing was that he hot-mopped (i.e. applied tar to) the shower pan.
The job of the shower pan was to move water on the shower’s floor quickly to the drain, but the problem with the hot mop was that it cracks over time.
That is what you don’t want, especially in the shower pan which is constantly exposed to water.
After all, water will find any crack or hole, and that would ultimately lead to water damage and mold beneath the shower pan.
Finally, the general contractor didn’t slope the shower pan enough to quickly make the water move to the drain.
This was what caused water to pool and drain slowly on the shower’s floor, especially on the corners, which was where cracks and gaps in the grout were emerging.

I suspect this was a major reason why the grout on the floor remained visibly damp long after use, which further undermined the grout’s integrity.
In fact, it seemed like the general contractor merely eyeballed the slope of the shower pan towards the drain.
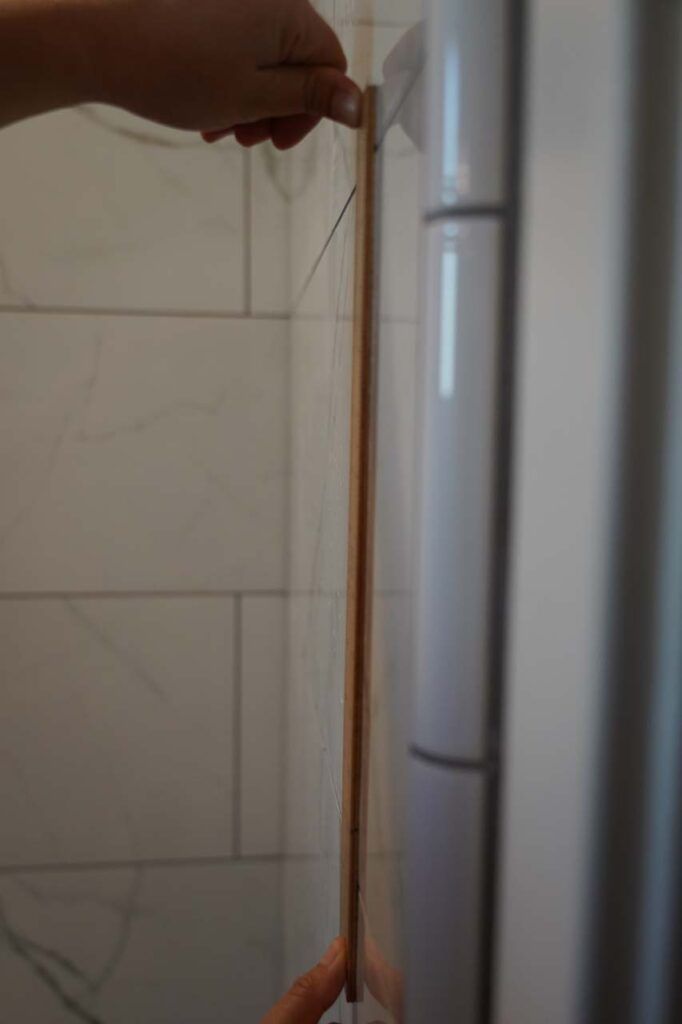
In order to ensure there was sufficient slope on the shower’s flooring, he could have measured its slope against a leveler as a reference.
So in summary, the following was what our general contractor didn’t do right…
- Lack of vapor retardant and barrier applied at the backer board joints (especially at the corners), which allowed mold to grow behind the walls
- Insufficient application of mortar for proper tile bonding and placement
- Did not account for wall tilt or bumps, which manifested as uneven tile placement on the surface
- Application of hot mop on the shower pan instead of employing a sturdy waterproof membrane that lasts much longer
- Insufficient slope on the shower pan, which allowed water to pool on the corners of the floor
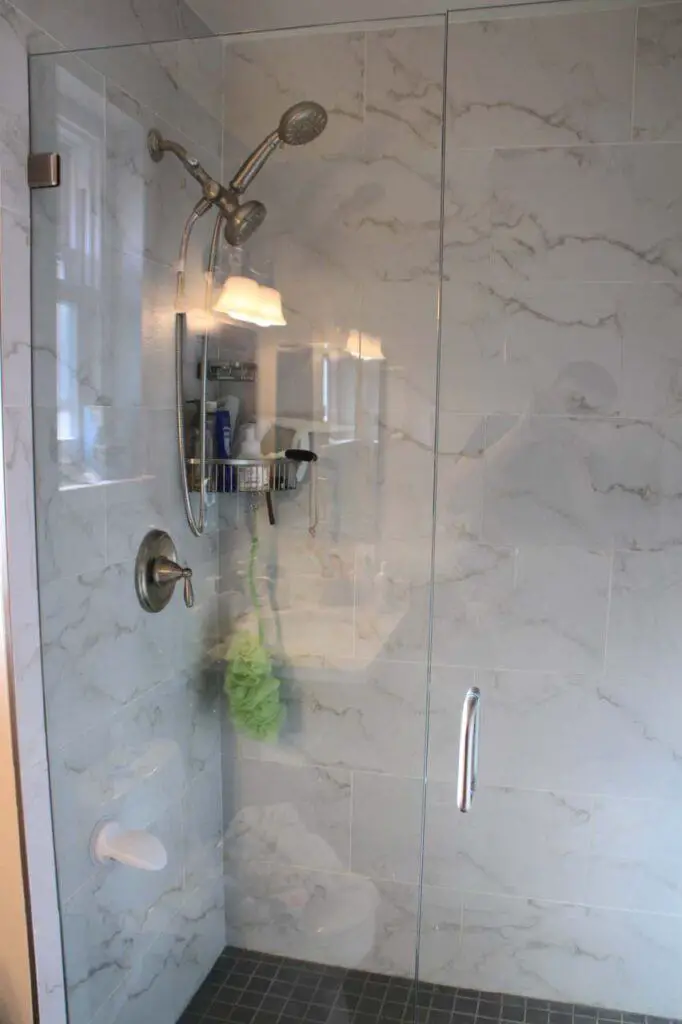
What Was The Proper Way To Do Our Bathroom Remodel?
The tile contractor that we found and trust employs what may be construed as the “old school” way of bathroom remodeling, especially for showers and baths.
The prevalent way of bathroom remodeling these days involves the use of backer boards, which was what our general contractor did.
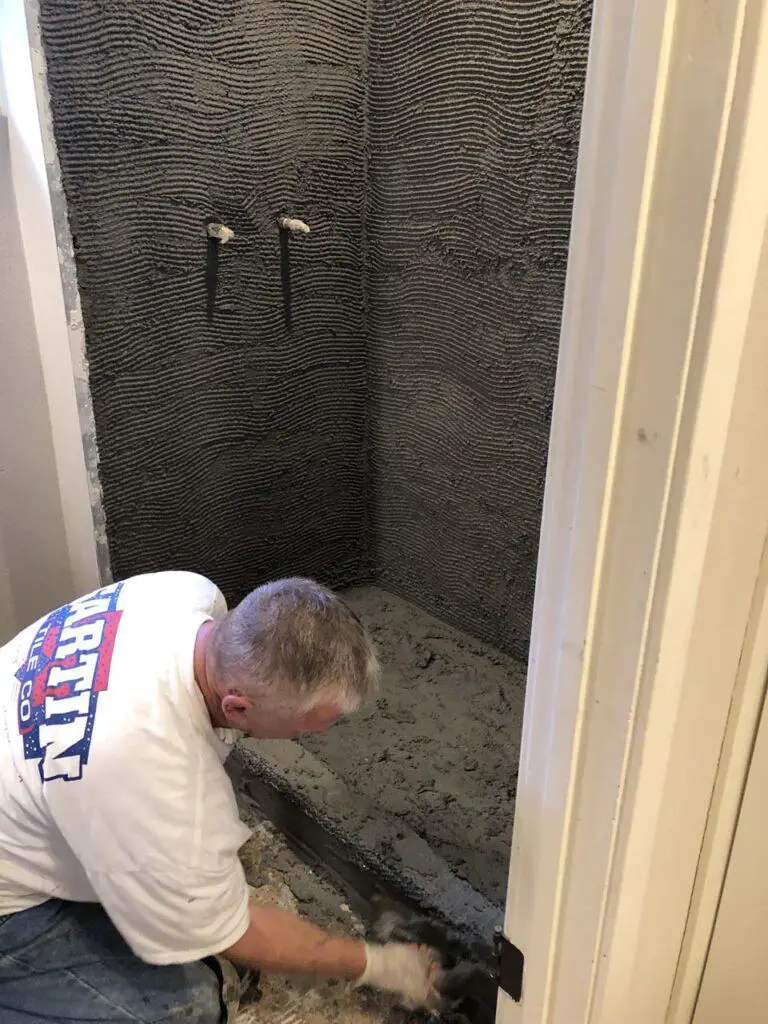
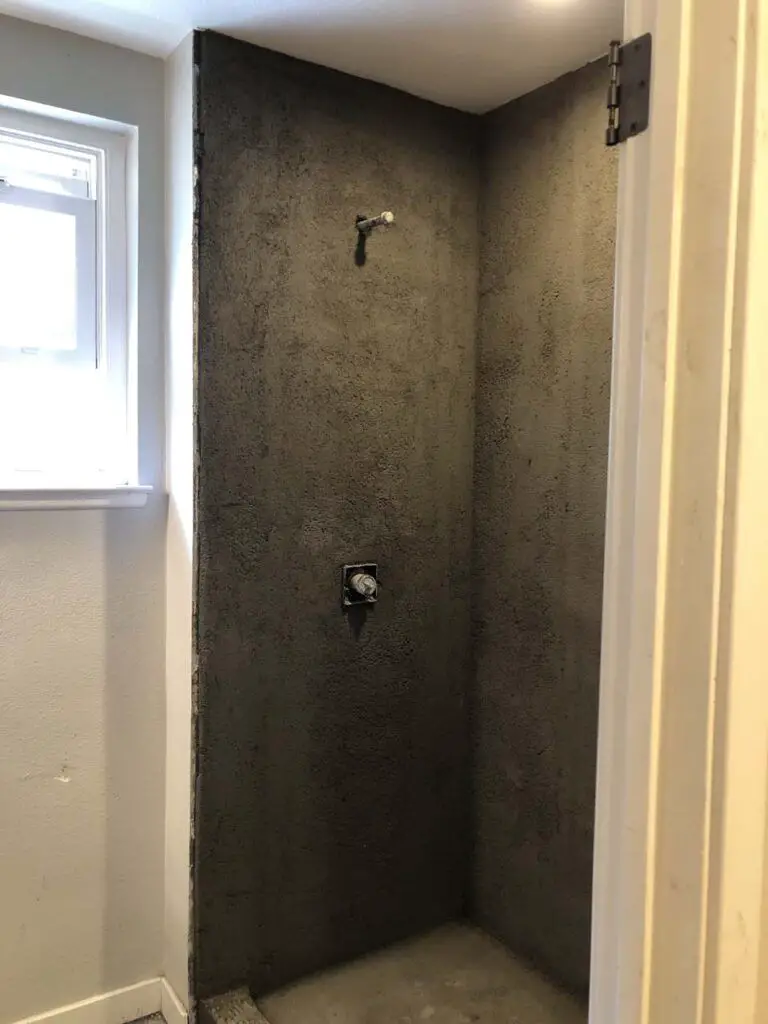
While it’s possible to do a shower installation using backer boards that can last a long time if done properly, our tile contractor used a technique called a mud float.
It’s something that he has been employing for the 35 years he has been in business, and he never had to go back to any of his jobs due to a failure as far as his tile work is concerned.
However, it’s getting harder to find tile contractors that employ the mud float methodology because it’s more labor intensive, requires a bit of experience to do properly, and not as conducive to the larger do-it-yourself (DIY) market.
That said, it’s the tried and true way of doing bathroom remodels over the years while the newer products and methodologies still have yet to undergo enough of a sampling of end-of-life cases to truly see how well they stack up in terms of longevity and effectiveness over life.
There’s a nice mud float video that pretty much showed how our tile contractor did our master bathroom shower, which I’ve included below.
The Importance Of Choosing The Valve
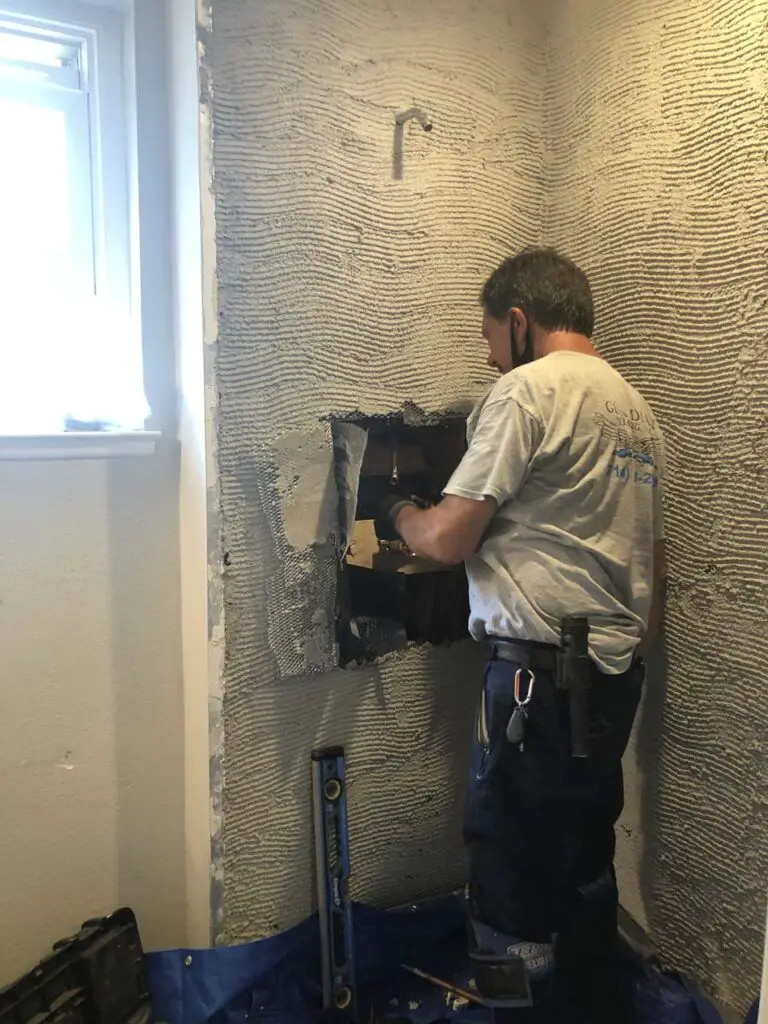
Before the waterproofing and mud float was to be applied, we had to make sure that we had a plumber install the desired valve.
That’s because once the wall is sealed and closed, we’d have to break the wall in order to access the valve should anything happen to it.
Therefore, it’s critical that we choose a valve that is well-built, not going to leak, and can mate with cartridges that are easily found on the market.
The choice of the valve is not an easy decision to make, especially since most shower valves only work with specific cartridges.
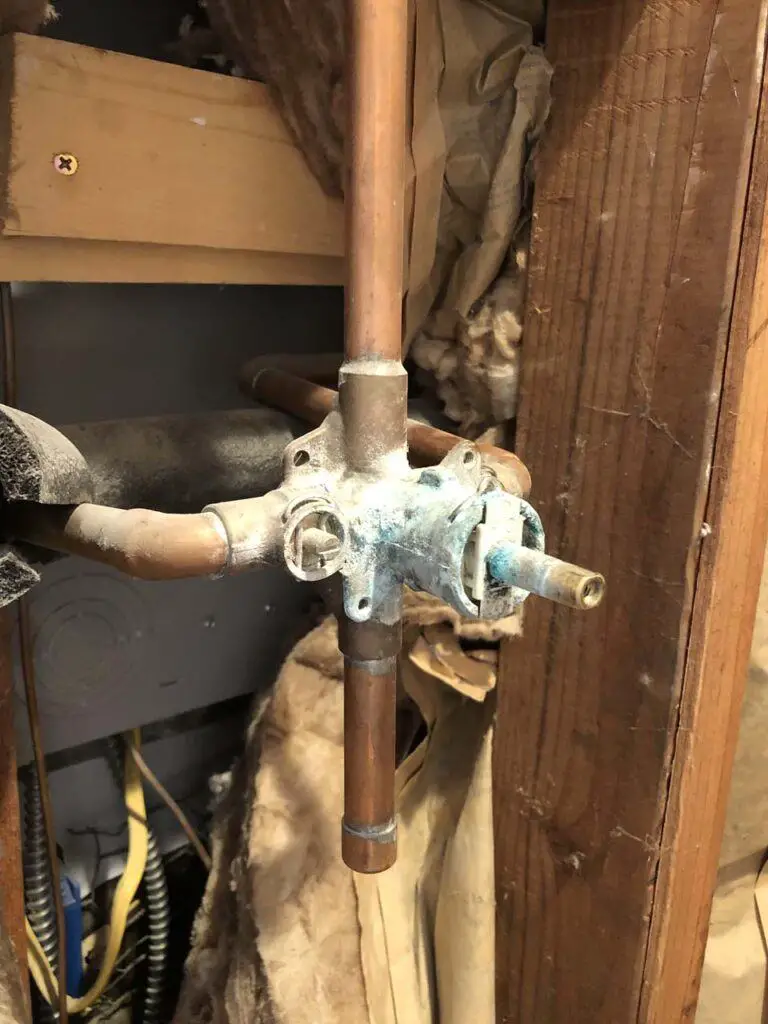
So not only must the shower valve be long lasting and installed properly to prevent leaks, but when the shower cartridges need to be replaced, those replacements must also be available.
Unfortunately, with market forces pushing manufacturers towards planned obsolescence to stay in business, this is not a guaranteed thing.
Moreover, we had a particular requirement to be able to control water pressure and temperature independently.
However, well-made valves that meet this requirement are practically non-existent in most home improvement or supplier shops (especially in California) so it was a bit of an ordeal for us to finally find one that didn’t break the bank.
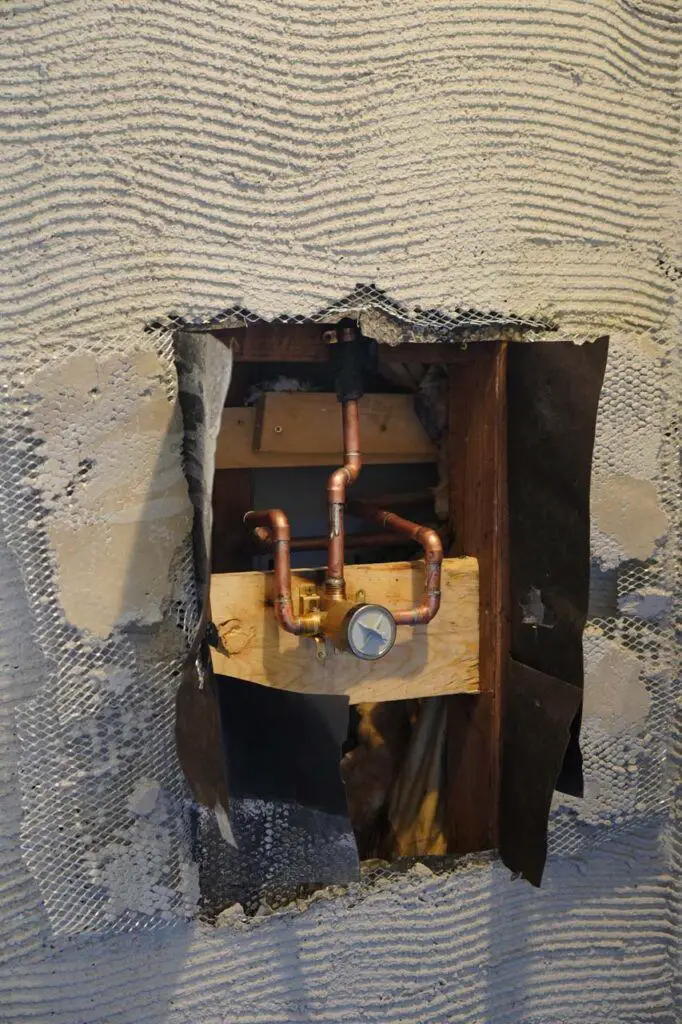
The bottom line was that this ordeal paused our tile contractor’s work, but it was critical that we took the time to ensure the plumbing was correct instead of regretting a hasty decision.
Summary Of Our Tile Contractor’s Work
Once we finally got the desired valve, then the tile contractor could go about doing his work.
As far as the steps that our tile contractor employed on our bathroom remodel redo, I can only summarize what he did.
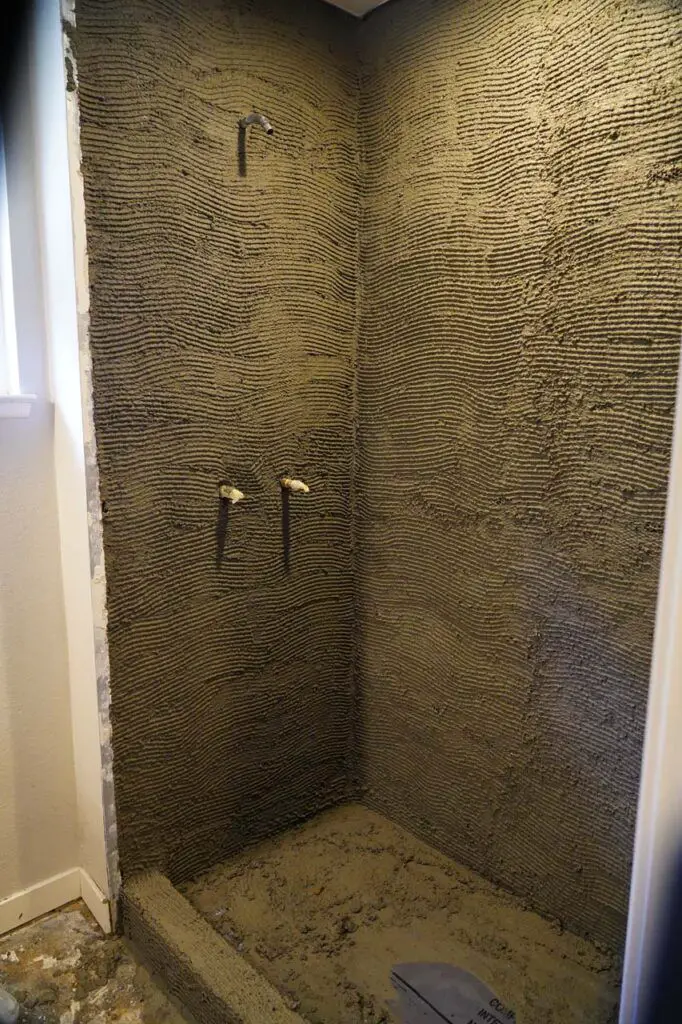
- Waterproofed the shower walls and shower pan with a membrane
- Applied wire and first layer of concrete float
- Floated and sloped the shower pan
- Applied the second layer of concrete float and ensured it was square
- Applied mortar and placed tiles
- Applied grout
How Much Did Our Bathroom Remodel Jobs Cost Us?
Our initial bathroom remodel on our home in 2014 cost us about $6000-$7000 for both bathrooms, including labor and materials (as well as the plumbing).
Our bathroom remodel done on our rental house in 2014 cost us about $7200 for both bathrooms, and it cost perhaps an additional $1000 for plumbing materials.
For both remodeling jobs in our rental and home, the shower door installation cost us $1000.
However, it cost us about $7500 in labor and tiling materials in 2021, and this was just the master bathroom.
It also cost us an additional $1000 for the valve, cartridge, and shower head in addition to the plumber’s time.
Then, it cost us an additional $1500 for the shower door installation.
At the time this article was written, we have yet to start the larger guest bathroom remodel, which was estimated to be $6700 in labor and materials, but we still are working on plumbing and materials cost.
So overall, the cost breakdown can be summarized as follows…
- Both bathroom installations in our rental in 2014: $9200
- Both bathroom installations in our home in 2014: $8000
- Master bathroom redo in our home in 2021: $10,000
- Guest bathroom redo in our home in 2021: at least $6700 + TBD
- Total cost if we had done it right the first time in 2014: $9200
- Total cost now that we had to redo our bathrooms as of 2021: $8000 + $10,000 + $6700 + TBD
The TBD (to be determined) concerns the cost of plumbing and materials, which have long lead times due to pandemic-related complications with the supply chain accompanied with inflation.
Final Thoughts / Conclusion
This was yet another classic case of how not doing a job right the first time ended up costing us a lot more money (and potential health issues) in the long run.
Indeed, in order for a bathroom remodel job to last, you really want an installation that confines the water to only the shower and not letting moisture get behind the wall nor underneath the floor.
As you can see with our experiences, a poorly done bathroom remodel ultimately means we had to pay even more money to redo the whole thing.
At least we were proactive about the problem and we didn’t let it persist because who knows how much more we could have been paying in terms of health problems (many of which probably can’t be solved with throwing money at them) resulting from the mold that was growing?
As upset as we were about our general contractor’s bad bathroom remodel job after the fact, he did do other parts of the house correctly like the open-floor plan, which involved taking down a load-bearing wall and adding reinforcement to the remaining support structures (all while having a city official inspect the work).
Nevertheless, the biggest takeaway from our misfortune is that it’s better to have specialized contractors work in their areas of expertise instead of having one contractor work many different jobs.
Thus, in the absence of having that foresight of what to anticipate in a bathroom remodel job, you’re relying on someone who has years of experience.
Only then could we have the confidence that the bathroom remodel job was done correctly and avoided these extra expenditures and health risks in the first place.
And hopefully, you can learn from our painful lesson that we’ve shared in this article so you don’t have to make the same mistake and deal with the consequences!
Hi,
Appreciate you sharing your experience. I’m going through the exact same thing right now. Hired a contractor seems to be doing everything right until getting to the bathrooms. Using Schluter-Kerdi shower pan but he’s using Redguard to seal everything that rose a big red flag for me. Considering tearing up everything and hiring a contractor that knows the product well to to the job. I’m in about $3,500 in materials that I may have to sacrifice.
Ouch. At least you’re catching it before you have to live with the consequences of a botched job years after it’s done.
I think the big takeaway from this experience is to be very skeptical of all-in-one jack-of-all-trade contractors. The bathroom definitely needs to be done by someone who is really experienced in doing bathrooms, especially managing the risks of water.